Last updated: Jan 27th, 2020
About this guide
Learn how to connect your AirBridge device to your Wi-Fi network using your windows PC.
Applies to Models
• AB1000-WIFI-TH
• AB1000-WIFI-TH-DL
• AB1000-WIFI-A-TH
• AB1000-WIFI-A-DL-TH
• AB1000-EM-WIFI-A
• AB1000-EM-WIFI-A-DL
• AB1000-EM-WIFI-TH-A
• AB1000-EM-WIFI-TH-A-DL
Getting Started
The first step to configuring your AirBridge device is to connect it to your Wi-Fi network. In order to do this you need to configure the Wi-Fi network’s SSID and password into your AirBridge device. This process is called On-boarding.
Let’s get started with the on-boarding process.
Step 1: Set your AirBridge device to on-boarding mode.
• Press the Function button on the AirBridge device. This will put the device in on-boarding mode and you will see the 'Link' L E D blinking rapidly.
Step 2: Connect to your AirBridge device hotspot.
• Connect your PC to your AirBridge device by connecting to the Wi-Fi hotspot created by the AirBridge device.
• The Wi-Fi hotspot will be prefixed with the keyword: "LYFE".
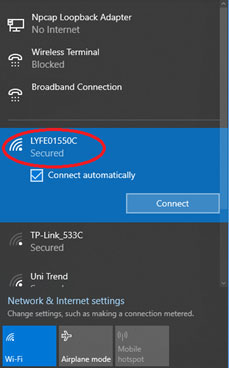
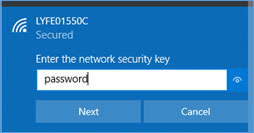
• Enter “password” as the password.
Step 3: Configure Wi-Fi credentials on your AirBridge device.
• Open command window. And go the folder where you have downloaded the On-boarding script.
• From the command window run the onboarding script, passing the Wi-Fi network's SSID and password as parameters to the script. For example if your Wi-Fi network is “MyWiFi” and password is “MyPassword”, type the following command: ‘python onboard.py MyWiFi MyPassword’
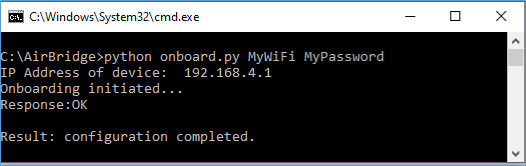
• When it is successfully configured, the AirBridge device responds with 'OK'.
• Notice the 'Link' LED on your AirBridge device slows down and blinks slowly.
On-boarding process is now complete.